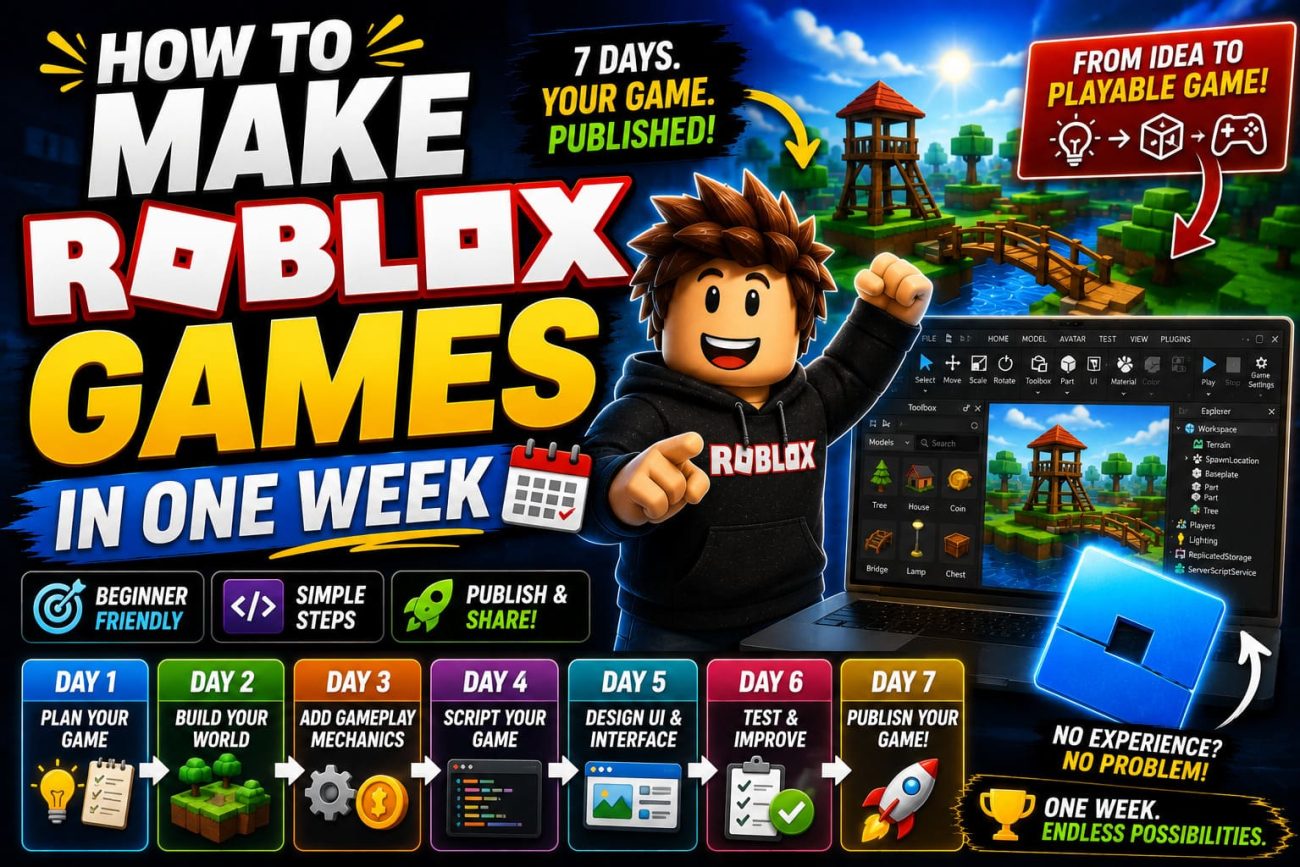
Making your first Roblox game can seem complicated when you look at large experiences with hundreds of features, detailed maps, advanced systems, and thousands of players.
The good news is that you don’t need to build something huge for your first project.
If you’re a complete beginner, one week is enough to learn the basics of Roblox Studio and create a small, playable Roblox experience—provided you keep the project simple.
The key is not trying to build the next massive Roblox hit in seven days.
Instead, your goal should be:
Learn → Build → Test → Improve → Publish
This guide provides a realistic seven-day roadmap for beginners who want to create their first Roblox game.
What Can You Realistically Build in One Week?
Before starting, set realistic expectations.
In seven days, a beginner probably won’t create a massive role-playing game with:
- Hundreds of quests
- Complex economies
- Advanced AI
- Large multiplayer systems
- Hundreds of custom assets
- Sophisticated matchmaking
However, you can create a small experience such as:
- Obby
- Simple survival game
- Basic simulator
- Small racing game
- Simple tycoon
- Mini adventure
- Collect-and-upgrade game
- Short obstacle challenge
Your first project should be small enough that you can actually finish it.
Finishing a simple game teaches you more than spending months planning an enormous project that never gets completed.
What You Need Before Starting
You don’t need an expensive computer or a large development team.
At minimum, you’ll need:
- A Roblox account
- Roblox Studio
- A computer capable of running Roblox Studio
- Basic computer skills
- Time to practice
- A simple game idea
You don’t need to be an expert programmer before beginning.
Roblox Studio allows beginners to build environments visually, while scripting can be learned gradually with Roblox’s programming tools.
Day 1: Learn Roblox Studio
Your first day should focus on understanding the development environment rather than immediately building your final game.
Spend some time learning:
- Explorer
- Properties
- Workspace
- Parts
- Models
- Terrain
- Materials
- Move tool
- Scale tool
- Rotate tool
- Play testing
Create a Small Test Area
Open a new project and create a simple environment.
Add:
- A floor
- Several platforms
- A spawn point
- A few obstacles
- Some basic decorations
Don’t worry about making it beautiful.
Your goal is simply to understand how objects work.
Move them around.
Resize them.
Change their properties.
Delete them.
Then use Play mode to see how your game behaves.
Learn the Basic Interface
You should understand where important objects are located before moving to scripting.
For example:
Explorer: Shows objects and the structure of your experience.
Properties: Allows you to change settings for selected objects.
Workspace: Contains objects that exist in the 3D game world.
Understanding these basic tools will make the rest of the week much easier.
Day 2: Choose a Small Game Idea
Now choose the actual project.
The most important rule is:
Make the idea smaller.
Instead of:
“I’m going to create a massive open-world Roblox RPG.”
Try:
“I’m going to create a small dungeon with three rooms and one final challenge.”
Instead of:
“I’m creating the ultimate simulator.”
Try:
“I’m creating a simple coin-collection game with upgrades.”
A small concept is much easier to finish.
Example Beginner Game Ideas
Here are some realistic one-week projects:
Simple Obby
Players complete a series of obstacles and reach the finish.
Coin Collector
Players collect coins around a small map.
Survival Challenge
Players survive waves of simple hazards.
Mini Racing Game
Players race around a small track.
Basic Tycoon
Players purchase a few upgrades and gradually expand a small base.
Simple Escape Game
Players solve a few basic challenges to reach an exit.
Choose one.
Don’t combine five game ideas into your first project.
Day 3: Build the Core Gameplay
By the third day, you should start building the main gameplay loop.
A gameplay loop is the sequence players repeatedly perform.
For example:
Explore → Collect → Earn → Upgrade → Repeat
Or:
Start → Avoid obstacles → Reach checkpoint → Continue → Finish
Or:
Enter arena → Fight enemies → Survive → Earn reward → Repeat
Your game doesn’t need dozens of mechanics.
It needs one mechanic that is enjoyable enough to repeat.
Build the Main Map
Keep the first version small.
For an obby, you might create:
- Starting area
- Five obstacles
- Checkpoint
- Final challenge
- Finish area
For a racing game:
- Starting line
- Track
- Obstacles
- Checkpoints
- Finish line
For a survival game:
- Small arena
- Spawn area
- Enemy area
- Safe zone
- Reward area
Don’t spend hours decorating areas players may never visit.
Build the playable section first.
Day 4: Learn Basic Scripting
This is the day when your game starts becoming interactive.
Roblox uses Luau, Roblox’s scripting language.
You don’t need to become an advanced programmer in one day.
Start by understanding simple concepts such as:
- Variables
- Functions
- Events
- Conditions
- Loops
- Properties
- Player objects
Start With Simple Scripts
For example, you might create a script that detects when a player touches an object.
The important thing isn’t memorizing code.
It’s understanding the relationship between:
Player action → Script → Game response
For example:
Player touches coin → Coin disappears → Player receives reward
That basic concept can be expanded into much more complicated systems later.
Don’t Copy Random Scripts Without Understanding Them
Beginners often search for a script online, paste it into their project, and hope it works.
This can create problems.
You may not understand:
- What the script does
- Where it should be placed
- What permissions it requires
- Whether it contains unwanted behavior
- Why it breaks when another system changes
Use tutorials and documentation to learn what your scripts are doing.
Even if you initially use an example, take time to understand the important parts.
Day 5: Add Progression and UI
Your game should now have a basic playable loop.
Day five is about making it easier and more satisfying to play.
You can add simple systems such as:
- Score
- Coins
- Checkpoints
- Timer
- Level counter
- Health
- Basic rewards
Create a Simple UI
Players need to understand what is happening.
Your interface might display:
Coins: 25
Level: 3
Time: 01:42
Objective: Reach the finish
Keep the interface simple.
A beginner project doesn’t need ten different menus.
Add a Clear Objective
When someone enters your game, they should understand what to do.
For example:
Collect 20 coins and reach the exit.
is much clearer than giving the player no instructions.
Day 6: Test Everything
Day six should be focused heavily on testing.
Play your own game repeatedly.
Then ask someone else to play it if possible.
You will discover problems you didn’t notice while building.
Test the Following
Gameplay
Can the player actually complete the game?
Controls
Are the controls understandable?
Difficulty
Is the first section too difficult?
Bugs
Do objects disappear incorrectly?
Do checkpoints work?
Do rewards work?
Performance
Does the game run smoothly?
UI
Can players read the important information?
Spawn
Does the player spawn in the correct location?
Test Like a New Player
This is extremely important.
You’ve already spent hours working on the game, so you know how everything works.
A new player doesn’t.
Pretend you’ve never seen the game before.
Ask:
What am I supposed to do?
If you can’t answer that within a few seconds, your onboarding probably needs improvement.
Day 7: Polish and Publish
Don’t spend the final day adding ten new features.
Instead, improve what already exists.
Fix bugs.
Improve confusing areas.
Adjust difficulty.
Clean up the UI.
Improve the lighting.
Add simple sounds where appropriate.
Make the game feel finished.
Create a Better Game Icon
Your icon is one of the first things potential players see.
Make it:
- Clear
- Relevant
- Easy to recognize
- Consistent with the actual game
Don’t use a misleading image that promises features your game doesn’t contain.
Create a Good Thumbnail
Your thumbnail should communicate the main idea of your experience.
If the game is an obstacle course, show the obstacle course.
If it’s a racing game, show the race.
If it’s a survival game, show the main survival mechanic.
Avoid filling the image with too much tiny text.
Before Publishing
Run through a final checklist.
- Game starts correctly
- Player spawns correctly
- Main objective is obvious
- Core gameplay works
- Rewards work
- Checkpoints work if included
- UI is readable
- Major bugs are fixed
- Game has been tested
- Icon represents the game
- Thumbnail represents the game
- Description explains the experience
- Mobile controls have been tested where applicable
Don’t Expect Instant Success
Publishing your first Roblox game doesn’t guarantee players.
You might publish it and receive very little traffic.
That’s normal.
Your first game has a different purpose.
It teaches you how the development process works.
Your first project gives you experience with:
- Roblox Studio
- Building
- Scripting
- UI
- Testing
- Publishing
- Player feedback
- Game design
The second project can then be better than the first.
What to Do After Your First Week
Once the game is published, don’t immediately start a completely new project.
Watch how people interact with it.
Look for problems.
Ask players:
- What did you enjoy?
- What was confusing?
- What should be changed?
- What feature would you like next?
- Where did you stop playing?
Use that feedback to improve the game.
Version 1.1
Your first update might include:
- Bug fixes
- Better instructions
- One new level
- UI improvements
- Difficulty adjustments
You don’t need a giant update every week.
Small improvements can make the experience better over time.
A Realistic One-Week Schedule
Here’s a simple schedule you can follow.
| Day | Main Goal |
|---|---|
| Day 1 | Learn Roblox Studio |
| Day 2 | Choose the game idea |
| Day 3 | Build the core map |
| Day 4 | Add basic scripting |
| Day 5 | Add UI and progression |
| Day 6 | Test and fix bugs |
| Day 7 | Polish and publish |
The exact amount of time you spend each day will depend on your experience.
A complete beginner may need longer than someone who already knows Roblox Studio.
What Not to Do During Your First Week
There are several mistakes that can prevent beginners from finishing their first game.
Don’t Build a Huge Map
A giant map doesn’t automatically make a good game.
Build only what your gameplay requires.
Don’t Add Too Many Features
Every feature adds development and testing work.
A small polished game is better than a huge unfinished project.
Don’t Spend the Whole Week Decorating
Beautiful environments are useful, but decoration shouldn’t come before gameplay.
Make the game fun first.
Don’t Chase Monetization Immediately
Your first priority should be creating a playable experience.
Once your game provides genuine value to players, you can learn about appropriate monetization options.
Avoid designing the entire game around aggressive monetization.
Don’t Compare Your First Game With Massive Roblox Experiences
Popular Roblox games may have:
- Large development teams
- Professional artists
- Experienced programmers
- Years of development
- Significant testing
- Established communities
Your first game is supposed to be a learning project.
How to Make Your Next Game Better
After completing your first game, write down what went wrong.
Maybe:
Problem: The map took too long to build.
Solution: Use a smaller map next time.
Problem: Players didn’t understand the objective.
Solution: Add better onboarding.
Problem: The game became repetitive.
Solution: Add progression or additional gameplay variety.
This turns every project into a learning cycle.
A Better Long-Term Roadmap
Your first week should only be the beginning.
A realistic progression could look like:
Week 1
Build your first small playable experience.
Month 1
Learn more Luau and Roblox Studio.
Month 2
Build a more complete game with better UI and progression.
Month 3
Learn more advanced systems and optimization.
After that
Start developing larger projects based on what you’ve learned.
You don’t need to rush.
Game development is a skill that improves through repeated practice.
Final Thoughts
You can absolutely make a Roblox game in one week, but the definition of success matters.
Your goal shouldn’t be to create the next massive Roblox experience in seven days.
Your goal should be to create something small, playable, tested, and finished.
Start with a simple idea.
Build the core gameplay first.
Learn basic scripting.
Add a clear objective.
Test the experience with real players.
Fix the biggest problems.
Then publish it.
Once you’ve completed your first game, you’ll have something much more valuable than an unfinished ambitious project: actual development experience.
The first game may not become popular, and that’s okay.
The skills you gain while making it can become the foundation for your second, third, and eventually much larger Roblox projects.
Frequently Asked Questions
Can a beginner make a Roblox game in one week?
Yes. A beginner can realistically create a small playable experience in a week if the scope is kept under control. A complex commercial-quality game will generally require much more time.
Do I need to know coding to make a Roblox game?
You don’t need advanced programming knowledge to begin. However, learning Luau will give you much more control over gameplay mechanics and interactive systems.
What is the easiest Roblox game to make?
Simple obbies, basic collection games, and small obstacle challenges are generally easier starting points because their core gameplay loops can be relatively simple.
Can I make a Roblox game without a team?
Yes. Many small Roblox projects can be developed by an individual. Larger projects may eventually benefit from programmers, builders, UI designers, artists, and other specialists.
Should my first Roblox game be big?
No. Keeping your first project small greatly increases the chance that you’ll actually finish it and learn from the complete development process.
Can my first Roblox game become popular?
It is possible, but there is no guarantee. Focus first on creating a good experience and learning the development process rather than expecting immediate popularity.
What should I learn after making my first Roblox game?
Continue learning Luau, game design, UI design, optimization, debugging, and player analytics. Each new project can introduce more advanced systems.
